Battle of Villers-Bocage facts for kids
Quick facts for kids Battle of Villers-Bocage |
|||||||
|---|---|---|---|---|---|---|---|
| Part of Operation Perch | |||||||
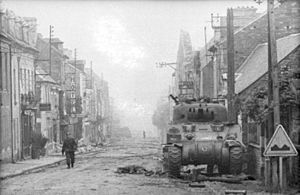
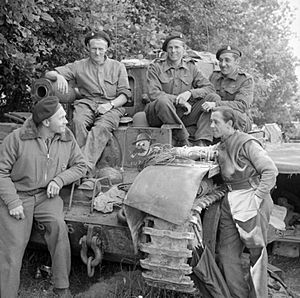
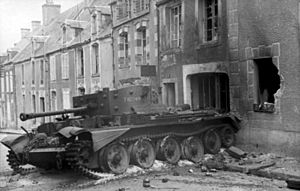 A Cromwell observation post tank on Villers-Bocage's main street commanded by Captain Paddy Victory, 5th Royal Horse Artillery; one of more than twelve vehicles attacked by Michael Wittmann. |
|||||||
|
|||||||
| Belligerents | |||||||
| Commanders and leaders | |||||||
| George Erskine William Hinde |
Fritz Bayerlein Heinz von Westernhagen |
||||||
| Strength | |||||||
| One Brigade group c. 60 tanks |
2 ad-hoc battle groups part of a heavy tank battalion 31–41 tanks |
||||||
| Casualties and losses | |||||||
| ~217 casualties 23–27 tanks |
8–15 tanks written off, others damaged | ||||||
| Several civilians | |||||||
The Battle of Villers-Bocage took place during the Second World War on 13 June 1944, one week after the Normandy Landings, which had begun the Western Allies' conquest of German-occupied France. The battle was the result of a British attempt to improve their position by exploiting a gap in the German defences west of the city of Caen. After one day of fighting in and around the small town of Villers-Bocage and a second day defending a position outside the town, the British force retreated.
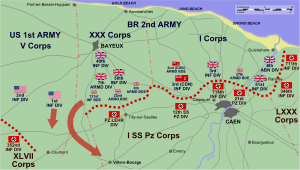
The Allies and the Germans regarded control of Caen as vital to the Normandy battle. In the days following the D-Day landings on 6 June, the Germans rapidly established strong defences in front of the city. On 9 June, a two-pronged British attempt to surround and capture Caen was defeated. On the right flank of the British Second Army, the 1st US Infantry Division had forced back the German 352nd Infantry Division and opened a gap in the German front line. Seizing the opportunity to bypass the German Panzer-Lehr Division blocking the direct route south in the area of Tilly-sur-Seulles, a mixed force of tanks, infantry and artillery, based on the 22nd Armoured Brigade of the 7th Armoured Division, advanced through the gap in a flanking manoeuvre towards Villers-Bocage. British commanders hoped that the appearance of a strong force in their rear would force the Panzer-Lehr Division either to withdraw or to be surrounded.
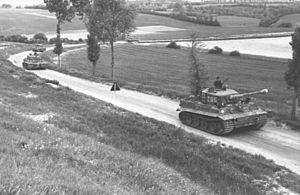
Under the command of Brigadier William "Loony" Hinde, the 22nd Armoured Brigade group reached Villers-Bocage without serious incident on the morning of 13 June. The leading elements advanced eastwards from the town on the Caen road to Point 213, where they were ambushed by Tiger I tanks of the 101st SS Heavy Panzer Battalion. In fewer than 15 minutes numerous tanks, anti-tank guns and transport vehicles were destroyed, many by SS-Obersturmführer Michael Wittmann. The Germans then attacked the town and were repulsed, losing several Tigers and Panzer IVs. After six hours, Hinde ordered a withdrawal to a more defensible position on a knoll west of Villers-Bocage. The next day the Germans attacked the brigade box, arranged for all-round defence, in the Battle of the Island. The British inflicted a costly repulse on the Germans and then retired from the salient. The Battle for Caen continued east of Villers-Bocage, the ruins of which were captured on 4 August, after two raids by strategic bombers of the Royal Air Force.
The British conduct of the Battle of Villers-Bocage has been controversial, because their withdrawal marked the end of the post D-Day "scramble for ground" and the start of an attritional battle for Caen. Some historians have written that the British attack was a failure caused by a lack of conviction among some senior commanders, rather than the fighting power of the German army, while others judge the British force to have been insufficient for the task. The "single-handed" attack by Wittmann early on, has excited imaginations to the extent that some historians and writers conclude that it has dominated the historical record to an unwarranted degree and that while "remarkable", the role of Wittmann in the battle has been exaggerated.
Contents
Background
D-Day and Operation Perch
The British 3rd Infantry Division, of I Corps, came ashore on Sword Beach on 6 June 1944, with Caen—9 mi (14 km) inland—as their final objective. The vicinity of Caen was attractive to Allied planners because it contained airfields and was open, dry and conducive to swift offensive operations, for which the Allies had the advantage of numerical superiority in tanks and mobile units. The attempt to capture Caen on D-Day was ambitious and traffic jams on the beaches delayed the 27th Armoured Brigade. The advance of the 3rd Infantry Division diminished as it fought past German fortifications and was stopped short of Caen before dark, by elements of the 21st Panzer Division.
The next day, the British began Operation Perch, an advance to the south-east of Caen, according to a contingency in the invasion plan. I Corps continued the attack towards Caen, but the Germans were able to reinforce the defenders, which made it impossible to rush the city with small numbers of men and tanks. On 9 June, the Allied ground forces commander, General Bernard Montgomery, revised Operation Perch to be a bigger attack with a pincer movement to surround the city. After delays caused by the time taken to get the attacking forces into position, on 12 June, simultaneous attacks began west and east of Caen. On the east side of the Orne River, in the airborne bridgehead, two attacking brigades of the 51st (Highland) Infantry Division were held up by the 21st Panzer Division and on 13 June, the attack was called off. To the west of Caen, XXX Corps was unable to advance south of the village of Tilly-sur-Seulles against the Panzer-Lehr Division, one of the most powerful armoured formations in the German army, which had recently arrived in Normandy.
Caumont Gap
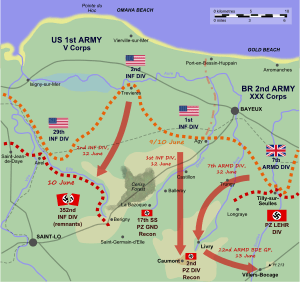
The envelopment of Caen had been prevented by the Germans on the right flank of XXX Corps, at the junction between the British Second and United States First armies, five German battle groups, including the last reserves of LXXXIV Korps had been destroyed, leaving only the remnants of the 352nd Infantry Division defending the front from Trévières to Agy. American attacks caused the left flank of the division to collapse and on the night of 9/10 June, the division retreated to Saint-Lô, leaving a 7.5 mi (12.1 km)-gap between the Panzer-Lehr Division and the German troops near Caumont-l'Éventé, with only the 17th SS-Panzergrenadier Division reconnaissance battalion left in the area. The Germans intended to fill the gap with the 2nd Panzer Division but on 10 June, the bulk of the division was still between Amiens and Alençon and not expected to arrive in strength until 13 June. Although reluctant to commit the 2nd Panzer Division piecemeal, General der Panzertruppe Hans Freiherr von Funck, commander of the XLVII Panzer Korps, rushed the divisional reconnaissance battalion to Caumont to hold the high ground.
The Second Army commander, Lieutenant-General Miles Dempsey, ordered Lieutenant-General Gerard Bucknall, the XXX Corps commander and Major-General George Erskine, the 7th Armoured Division commander, to disengage the 7th Armoured Division from Tilly-sur-Seulles, move through the gap, seize Villers-Bocage and menace the exposed left flank of the Panzer-Lehr Division. The British objective was a ridge 1.6 mi (2.6 km) to the east of Villers-Bocage. Dempsey hoped that its capture would force the Panzer-Lehr Division to withdraw or risk being surrounded. The 50th (Northumbrian) Infantry Division and most of the infantry brigade of the 7th Armoured Division were to continue the attack against the Panzer-Lehr Division around Tilly-sur-Seulles and the 1st US and 2nd US Infantry divisions of the V US Corps would continue their advance.
The 7th Armoured Division spent the morning of 12 June attacking towards Tilly-sur-Seulles according to its original orders; at 12:00 Erskine ordered Hinde to move the 22nd Armoured Brigade immediately through the gap. Soon afterwards, the 8th King's Royal Irish Hussars, the divisional reconnaissance regiment, began to reconnoitre a route for the brigade and the rest of the division left Trungy at around 16:00. Four hours later the main body was close to Livry after a 12 mi (19 km) unopposed advance, the last 6 mi (9.7 km) of which was through German-held territory. The leading Cromwell tank of the 8th Hussars was destroyed by a Panzer-Lehr Division Escort Company anti-tank gun which held out for two hours. Taylor wrote that the lead tank was destroyed and Forty wrote that a leading tank was lost. Hoping to mislead the Germans about the objective, on reaching the vicinity of la Mulotiere, north of Livry, Hinde ordered a halt for the night and the 8th King's Royal Irish and 11th (Prince Albert's Own) Hussars, the XXX Corps armoured car regiment, reconnoitred the flanks. The 11th Hussars encountered no resistance on the right flank and gained touch with the 1st US Infantry Division near Caumont. On the left flank, 3 Troop, A Squadron, 8th Hussars, located elements of the Panzer-Lehr Division less than 2 mi (3.2 km) away. The two leading tanks were knocked out by an anti-tank gun and the Troop leader, Lieutenant H. Talbot Harvey was killed along with six other members of his troop.
Plan
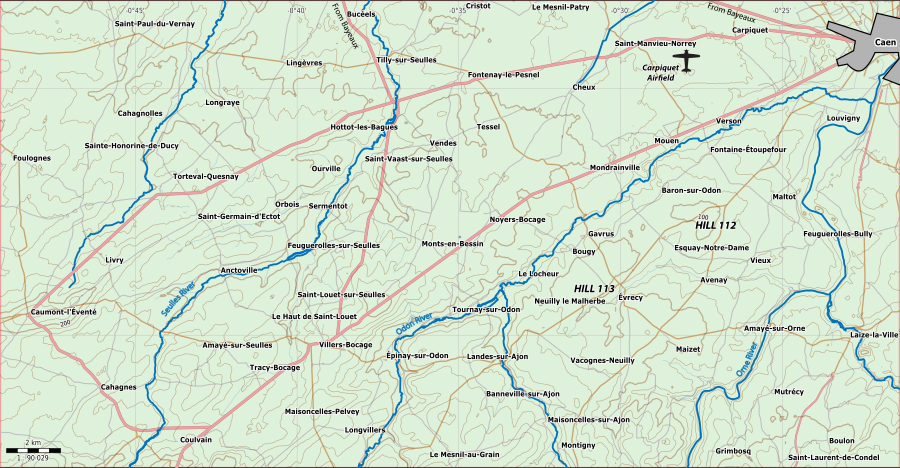
It was clear that to control Villers-Bocage, the British would have to occupy the ridge rapidly. The 4th County of London Yeomanry (Sharpshooters) (4th CLY), with a company of the 1st Battalion Rifle Brigade, was to pass through Villers-Bocage and occupy the highest point of the ridge at Point 213. The 1/7th Queen's Royal Regiment (West Surrey) would follow up and occupy the town and the 5th Royal Tank Regiment (5th RTR) and a company of the Rifle Brigade, were to take high ground at Maisoncelles-Pelvey to the south-west of Villers-Bocage. The 260th Anti-tank Battery of the Norfolk Yeomanry would cover the gap between the 4th CLY and the 5th RTR with 17pdr SP Achilles self-propelled anti-tank guns. The 5th Regiment, Royal Horse Artillery (5th RHA), would follow the rest of the brigade group with its Sexton self-propelled guns. The 5th RHA and the brigade group tactical headquarters were established at Amayé-sur-Seulles. The two Hussar regiments were to provide flank protection against the Panzer-Lehr Division and uncover German positions either side of the line of advance. The 131st Infantry Brigade, with the 1st Royal Tank Regiment (1st RTR) and the 1/5th and 1/6th Queen's, was to hold Livry as a firm base.
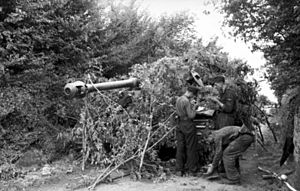
The I SS-Panzer Korps commander Obergruppenführer Sepp Dietrich ordered his only reserve, 101st SS Heavy Panzer Battalion to move behind the Panzer-Lehr and 12th SS-Panzer divisions in the Villers-Bocage area, as a precaution against an attempt to advance into the Caumont Gap. 101st SS Heavy Panzer Battalion had arrived in Normandy on 12 June, after a five-day drive from Beauvais. The battalion had an establishment of 45 Tiger I but had been reduced to about 17 serviceable tanks by an air attack near Versailles. The 1st Company moved to a position 5.6 mi (9.0 km) north-east of Villers-Bocage; the 2nd Company to just south of Point 213 on the Villers-Bocage ridge and the 3rd remained near Falaise with one serviceable tank. The 2nd Company had twelve tanks, but through a combination of losses and mechanical failures, only six Tigers were present on 13 June. The area around Villers-Bocage came under heavy naval artillery fire during the night of 12/13 June and the 2nd Company moved three times; the company planned a mechanical overhaul for the morning.
Battle
Advance
During the early hours of 13 June, the 1st Rifle Brigade reconnoitred the first 0.5 mi (0.80 km) of the route. Livry was reported to be clear of Germans and the advance resumed at 05:30 with the 4th CLY leading the way. The column was met by jubilant French civilians, leading to a relaxed mood among the soldiers. Erroneous information was passed to the British that German tanks were stranded in Tracy-Bocage and rumours held that other tanks were similarly stranded at the Château de Villers-Bocage. On 11 June, German medical personnel had established a hospital at the château but had left at dawn on 13 June; a few German troops remained about the town.
As the column approached Villers-Bocage, an Sd.Kfz. 231 armoured car crew observed the British advance and escaped. At 08:30, having covered 5 mi (8.0 km), the 22nd Armoured Brigade group entered the town to be greeted by celebrating residents; two German soldiers were spotted leaving at high speed in a Volkswagen Kübelwagen. The two Hussar regiments made contact with German forces on either side of the 22nd Brigade group route and the 8th Hussars engaged Schwerer Panzerspähwagen (eight-wheeler armoured cars). The Hussars reported German tanks heading towards Villers-Bocage but Lieutenant Charles Pearce, of 4th CLY, thought that these were probably self-propelled guns.
Morning
With Villers-Bocage occupied, A Squadron 4th CLY motored ahead to Point 213 without reconnaissance, as ordered. A Kübelwagen was destroyed and the tanks moved into hull down positions to establish a defensive perimeter. Along the road between the town and the ridge, the personnel carriers of the Rifle Brigade pulled over nose-to-tail, to allow reinforcements for Point 213 to pass. The riflemen dismounted and posted sentries but could see fewer than 250 yd (230 m) to either side of the road.
Major Wright, the commanding officer of the 1st Rifle Brigade, called a conference at Point 213 for all officers and the senior NCOs of A Company. It was realised that a shell could kill the company commanders and the half-track occupants were rapidly dispersed among several other vehicles. In Villers-Bocage Lieutenant-Colonel Arthur, Viscount Cranley, commander of the 4th CLY, expressed concern that his men were "out on a limb" but was assured by Hinde that all was well and was ordered to Point 213, to ensure his men had taken up good defensive positions. Hinde then left Villers-Bocage for his headquarters.
South of Point 213 Wittmann, the commander of the 2nd Company, 101st SS Heavy Panzer Battalion, was surprised by the British advance through Villers-Bocage:
I had no time to assemble my company; instead I had to act quickly, as I had to assume that the enemy had already spotted me and would destroy me where I stood. I set off with one tank and passed the order to the others not to retreat a single step but to hold their ground.
Wittmann's Tiger was spotted at about 09:00 by Sergeant O'Connor of the Rifle Brigade, who was travelling towards Point 213 in a half-track and broke radio silence to give the only warning the British force received. The Tiger emerged from cover onto Route Nationale 175 and knocked out a Cromwell, the rearmost tank at Point 213. A Sherman Firefly was then knocked out, caught fire and blocked the road. The British at Point 213 were then engaged by the rest of the 2nd Company and lost three more tanks.
Wittmann drove on towards Villers-Bocage. Along the road, the Rifle Brigade troops attempted to reply with PIAT anti-tank weapons and a 6-pounder anti-tank gun but as the Tiger drew closer, panic set in and the riflemen looked for cover. The brigade vehicles were set on fire by machine guns and high-explosive shells but few casualties were suffered. At the east end of Villers-Bocage, Wittmann engaged and knocked out three M3 Stuart light tanks of the 4th CLY Reconnaissance Troop.
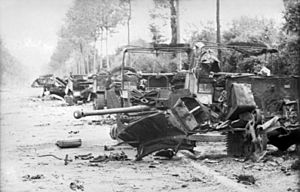
In the town, the tanks of the 4th CLY Regimental Headquarters tried to escape but their reverse speed was "painfully slow" and one tank fired two shots before being destroyed by the Tiger. Two tanks reversed off the road into gardens, the 4th CLY Adjutant, Captain Pat Dyas, parked behind a barn; the Tiger drove past a wrecked Stuart towards the centre of town, knocking out another tank but missed Dyas. Lieutenant Charles Pearce took his scout car and warned the rest of the reconnaissance troop in the town centre and Pearce continued westwards to alert B Squadron of the 4th CLY. Wittmann knocked out another Cromwell and on the main street, destroyed two artillery observation post (OP) tanks of the 5th RHA, the intelligence officer's scout car and the medical officer's half-track.
Forty and Taylor wrote that Wittmann was engaged by a Sherman Firefly and withdrew after collapsing a house that contained a German sniper. Bob Moore wrote that he forced Wittmann to retire when a shot from his tank dented the driver visor of the Tiger. Wittmann's withdrawal brought him close to Dyas who, having been bypassed, had been stalking the Tiger to fire at its thinner rear armour. The Cromwell shells had no effect and Wittmann destroyed the British tank. Pearce wrote that Wittmann engaged the Cromwell with the Tiger turret reversed. Dyas escaped the tank and was shot at by German infantry in houses along the street. Wittmann drove east to the outskirts of Villers-Bocage, before being disabled by a 6-pounder anti-tank gun at the Tilly-sur-Seulles road junction. Wittmann wrote that his tank was disabled by an anti-tank gun in the town centre. In less than 15 minutes, 13–14 tanks, two anti-tank guns and 13–15 transport vehicles had been destroyed by the 2nd Company, 101st SS Heavy Panzer Battalion, many by Wittmann. Wittmann and the crew made their way to the Panzer-Lehr Division headquarters at Cháteau d'Orbois, 3.7 mi (6.0 km) north of Villers-Bocage.
Point 213
Major Werncke of the Panzer-Lehr Division conducted a reconnaissance of Point 213 later in the morning and reconnoitring on foot, discovered a column of unoccupied Cromwell tanks. The tank crews were studying a map with an officer at the front of the column and Werncke drove one off before the British could react. At the east end of Villers-Bocage, he found a scene of "burning tanks and Bren-gun carriers and dead Tommies" and drove back to the Panzer-Lehr headquarters at Château d'Orbois. After the ambush on Point 213, A Squadron, 4th CLY had nine tanks operational, including two Fireflies and a Cromwell OP tank, although some were short of crew. There was one rifle section and an equal number of officers. It was decided to hold the position on the ridge until reinforcements arrived and an all round defence was organised. At around 10:00, support and reconnaissance troops of the 4th Company, 101st SS Heavy Panzer Battalion arrived and began to collect prisoners between the ridge and the town. Some of the British escaped and about 30 got back to the British lines.
The 1/7th Queen's took up defensive positions in Villers-Bocage and captured an advance party of three men from the 2nd Panzer Division. A relief force was prepared to rescue the troops on the ridge but this plan was rejected by Cranley. At about 10:30, Cranley reported that the position on Point 213 was becoming untenable and withdrawal was impossible. A break-out attempt was planned and two hours later, a Cromwell crew tried to get back to Villers-Bocage by a roundabout route and was knocked out by German tank fire. The Germans shelled the trees along the road, spraying shell and wood splinters and after five minutes the troops on the ridge surrendered. The British tried to burn their tanks but German soldiers arrived quickly and took thirty of the CLY prisoner, along with some riflemen and troops of the Royal Horse Artillery. A few men escaped; Captain Christopher Milner of the Rifle Brigade spent the rest of the day on the run and crossed back into the British lines after dark.
Wittmann briefed the Panzer-Lehr Division intelligence officer and was given a Schwimmwagen to return to Point 213. Kauffmann ordered Hauptmann Helmut Ritgen to block the northern exits of the town with 15 Panzer IV, mainly from 6th Company, 2nd Battalion Panzer-Lehr Regiment 130 and ten from a workshop south of Route Nationale 175. Ritgen rendezvoused with the Panzer-Lehr Division commanding officer, Generalleutnant Fritz Bayerlein, at Villy-Bocage. As Ritgen's tanks moved towards Villers-Bocage they ran into a British anti-tank gun screen and lost a tank. Four Panzer IVs entered the town from the south and the first two tanks were knocked out; the others withdrew.
In Villers-Bocage, A Company of the 1/7th Queen's secured the area around the railway station and B and C companies occupied the east side of the town. German infantry had entered the town and house-to-house fighting began. Two German tanks were damaged and driven off, but the 1/7th Queen's infantry companies became mingled and were ordered to fall back to reorganise. A Company was ordered back to the railway station, C Company was assigned the north-eastern edge of the town and D Company the south-eastern edge. B Company was placed in reserve and the battalion anti-tank guns were distributed along the front line. At the town square an ambush was laid by the 4th CLY. A Sherman Firefly, several Cromwells, a 6-pounder anti-tank gun and infantry of the 1/7th Queen's with PIATs, waited for German tanks to move down the main street. To the west of the town, the Germans attacked the 1/5th Queen's near Livry and lost a tank.
Afternoon
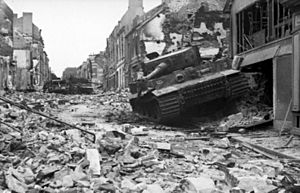
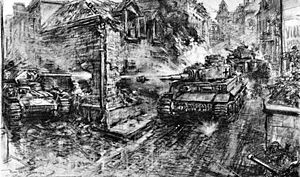
At around 13:00, tanks of the Panzer-Lehr Division advanced into Villers-Bocage unsupported by infantry. Four Panzer IVs tried to enter from the south near a wrecked Panzer IV and two were knocked out by anti-tank fire. Some Tigers were brought up and silenced the anti-tank position. Möbius divided the primary counter-attack down the main highway through Villers-Bocage and through the southern section of town parallel to the main road, to secure the town centre. The Tigers advanced slowly to intimidate the British into withdrawing and ran into the British ambush. The Firefly opened fire on the lead tank and missed but the anti-tank gun knocked it out. A group of three Tigers split up and drove through the back streets to flank the British; one was engaged by an anti-tank gun and destroyed, the other two were engaged with PIATs, one was knocked out and the other immobilised.
A fifth Tiger halted on the main street short of the ambush site, apparently waiting for the British to emerge from cover. The Tiger was spotted by the Firefly crew through the windows of a corner building. They reversed to shoot through the windows. The Tiger was hit on the gun mantlet and raced past the side street. A Cromwell advanced onto the main street and fired into the rear of the Tiger, knocking it out and then reversed back into cover. The Firefly knocked out a Panzer IV and during a lull, the disabled tanks were set on fire with blankets and petrol. Outside the town, the 7th Armoured Division brigade group stretched back to Amayé-sur-Seulles and was attacked from the north and south. The attacks were repulsed and at Tracey-Bocage, the 11th Hussars overwhelmed a pocket of resistance.
Under a mortar and artillery bombardment, the Germans attacked A Company 1/7th Queen's in the town and a platoon was cut off and captured. Even with the whole of the Queen's battalion in the town, the German troops found their way inside. Two grenadier battalions of the 2nd Panzer Division attacked from the south, were engaged by B Squadron 4th CLY and suffered many casualties. Both sides called for artillery support and several British mortars and a carrier were destroyed. By 18:00 the Queen's battalion headquarters was threatened and Hinde decided to withdraw before dark made the town untenable. Behind a smoke screen and bombardment by the 5th RHA and V US Corps, the infantry retreated covered by tanks of the 4th CLY. The Germans harassed the withdrawal with artillery fire and infantry from Tracy-Bocage attacked the British for 2+1⁄2 hours as they fell back. Though costly to the Germans this continued until around 22:30.
14 June
On 14 June, the 22nd Armoured Brigade group formed an all round defensive position, a "brigade box", in the Amayé-sur-Seulles–Tracy-Bocage–St-Germain area to overlook Villers-Bocage. Supported by the 1st Company, 101st SS Heavy Panzer Battalion, the Panzer-Lehr Division attacked the brigade box. The 1st US Infantry Division, on the heights around Caumont, opened observed artillery fire, which helped to defeat the first German attack. Later attacks got so close that the artillery could not fire without hitting British positions. A platoon was overrun and a counter-attack with tanks and infantry then forced the Germans back. The Germans subjected the box to harassing fire and attacked from two sides later in the day with artillery and tanks, which broke into the box and came close to the brigade headquarters before being repulsed. Although confident that the brigade box could be held, the inability of the 50th (Northumbrian) Infantry Division to come up, prompted the decision to recall the brigade group and straighten the front line.
Aftermath
Casualties
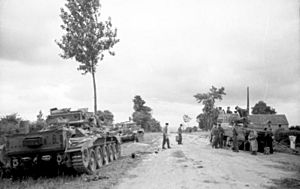
Contradictory sources make casualty figures difficult to establish. The 22nd Armoured Brigade group suffered around 217 men killed, wounded and missing, many of whom were taken prisoner at Point 213. This figure includes five riflemen who had been captured but were then shot by their guards, apparently for attempting to escape, when they took cover spontaneously in a ditch under American artillery fire. The British lost from 23–27 tanks, more than half of which were on Point 213, where A Squadron 4th CLY lost all 15 of its tanks. The Panzer-Lehr Division and the 2nd Panzer Division were in action elsewhere on 13 June and did not count the casualties at Villers-Bocage separately from the day's losses. The 101st SS Heavy Panzer Battalion was only engaged at Villers-Bocage and Taylor gave nine men killed and ten wounded in the 1st Company and one killed and three wounded in the 2nd Company.
Sources differ on the number of German tanks lost, in part because the Panzer-Lehr Division was committed piecemeal, making it impossible to be certain of the number of Panzer IVs knocked out. German tank losses are generally considered to be from 8–15, including six Tigers. Chester Wilmot states that this was a serious loss, as there were only 36 Tiger tanks in Normandy. Taylor wrote that the numbers claimed by the British included tanks that were immobilised and later recovered. Marie named at least nine French civilians who died on 13 June. Six were killed by crossfire or shrapnel during the battle and three by artillery fire just before midnight. Three of the deaths may have been war crimes. More civilians became casualties in the fighting and bombing later. Following the British withdrawal, the town was reoccupied and searched by the Germans; several shops, houses and the town hall were set on fire.
Bombing and liberation
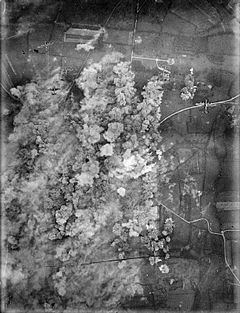
During the night of 14/15 June, to cover the withdrawal of the 22nd Armoured Brigade group, 337 Royal Air Force (RAF) bombers (223 Avro Lancasters, 100 Handley Page Halifax and 14 de Havilland Mosquitos from No. 4, No. 5 and No. 8 Group RAF) dropped 1,700 long tons (1,700 t) of high explosives on the town of Évrecy and on targets around Villers-Bocage, destroying one Tiger tank and damaging three more. No aircraft were lost. Just over two weeks later, at 20:30 on 30 June, Villers-Bocage was bombed again by 266 bombers (151 Lancasters, 105 Halifaxes and 10 Mosquitos from No. 3, No. 4 and No. 8 Group RAF) in support of Operation Epsom, dropping 1,100 long tons (1,100 t) of bombs. Only two aircraft were lost. The town was a vital traffic centre for German forces and though it was hoped that German troops would be caught in the bombing, only French civilians were present at the time. After being severely damaged by the fighting of 13 June and subsequent bombing raids, the town was liberated by a patrol of the 1st Battalion Dorset Regiment, 50th (Northumbrian) Infantry Division, on 4 August 1944.
Command changes
In early August, up to 100 men, including Bucknall, Erskine, Hinde and other senior officers were sacked and reassigned. Historians largely agree that this was a consequence of the failure at Villers-Bocage and had been planned since the battle. Daniel Taylor is of the opinion that the battle's outcome simply provided a convenient excuse and that the sackings took place to "demonstrate that the army command was doing something to counteract the poor public opinion of the conduct of the campaign".
Battle honours and awards
In 1956 and 1957, the British and Commonwealth system of battle honours recognised participation in the Battle of Villers-Bocage by the award to 11 units of the battle honour Villers Bocage, for service in expanding the bridgehead from 8–15 June. For his actions at Villers-Bocage, Michael Wittmann was promoted to Hauptsturmführer and awarded Swords to his Knight's Cross of the Iron Cross.


